My Watercolor Process (more chaos)
This week I had an amazing opportunity to do an Art Trade with the amazing Michael Dougherty, a storyboard artist from Nickelodeon. I was so excited that I wanted to get started right away! We decided on Little Red Riding Hood. Here is how I paint my pictures. It's a little chaotic and different so stay with me!

Little Red by Arlie Opal
The first thing I do is draw out a rough sketch of what I want. I draw this on smooth multimedia paper. Sketch paper is too rough and leaves graphite all over the place so I like to use smooth so that when I transfer I can see the lines better. I do use references, obviously I haven't drawn and painted enough wolves to know how to paint one. But as far as people, I've painted so many of them, I can usually draw and paint them how I want them. I did however use references for the fabric. I can almost draw it, but it's hard. That's why practice is so important!

Step One
After I get what I want I transfer the image to watercolor paper. I have a lightboard that I use called Huion. You can get it off amazon, it's really amazing, only $40 and super lightweight. The one thing you have to remember about watercolor paper is that you have to transfer lightly. I use a lead pencil and try to trace my image as lightly as possible. If you press to hard, the watercolors will fill the grooves and also once you paint over a pencil line it is sealed in. You can't erase it after that which is unfortunate sometimes.


Step Two
The paint brushes I use are Winsor and Newton Cotman Series 0000 round to 2 round for this particular picture. I love round brushes. I do have a mop brush, flat brushes and angular brushes.
The painting was done on a 5" X 7" so I used my tiny brushes for this one. I mostly used the 1 and the 0000.

Step Three
The next thing to do is to pick out your colors, I have Sennelier Professional Watercolors, so I like to grab a few that I use. I also mix these with my Winsor and Newton Semi-Professional Watercolors because I don't have a lot of space. I use a TV tray to paint on at the moment and only have one palette, so I struggle a little bit.


I use Cadmium Yellow Deep, Cadmium Red Light, and Royal Blue for skin color. It may sound strange to do that when a lot of watercolors come with a peach. But I never like to use those because you have more control over the different types of skin color. I mix the yellow with the red first, and depending on the skin color, whether it's more red or yellow. I use just a pinch of blue to negate the vibrancy and take out the warm tones. To do this I have a test sheet of watercolor paper to figure out the skin tone color that I like best.

Step Four
Do one layer of the watercolor painting trying to steer clear of where I want the highlights.
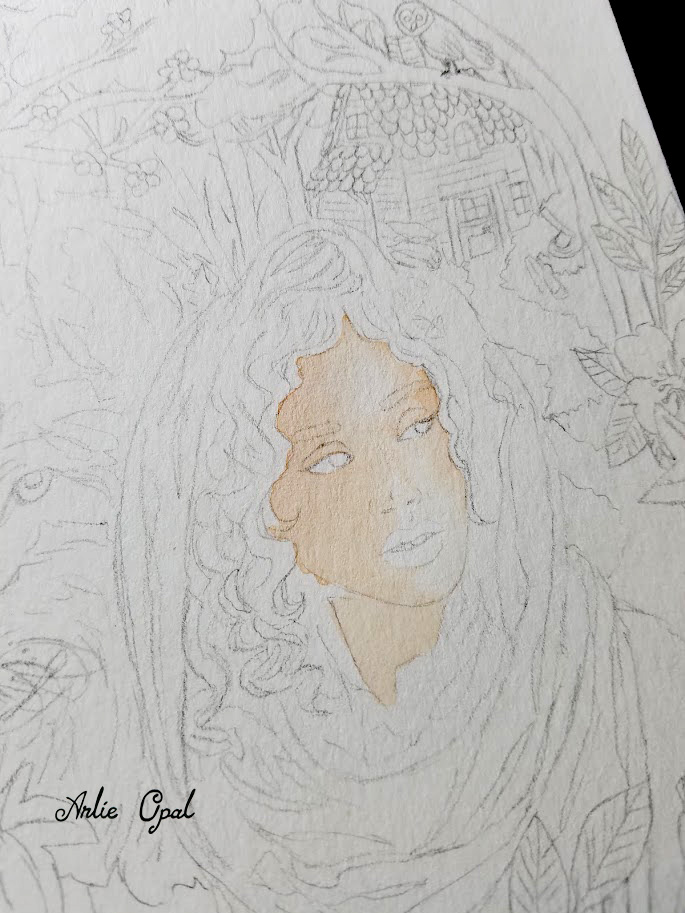
Adding in more yellow and reds on the cheeks, even browns and purples for the shadows. while that is drying I start on the cloak. Also painting with highlights in mind. Watercolor can sometimes be unforgiving, once you put paint down you can get it up but it's very difficult. So you have to make mistakes work. It's best to continue using the scrap piece of paper and overlap colors before you paint them.


Step Five
Progress so far! You can see my scrap paper, Cotman Watercolors and my single porcelain watercolor palette.

I continue with the shading around the face and start on the eyes. I paint over the eyebrows on purpose because I like to paint in the eyebrows with a tiny brush like natural hair. I also do the eyelashes that way. I do leave the lips open because of the shine on the lips. I let it dry in between steps.

Step Six
Red lips with avoidance painting for shines. Also painting in the rest of the eyelashes and eyebrows. I also paint in more the shadows. I mixed red with purple for shading. I try not to use black so much, and actually barely use black. A lot of the time I use Payne's Grey (which is more blue) or Neutral Grey (which is more brown).


Step Seven
I forgot to take picture in between the lips and here. You can see I did the hair, first with a yellow wash and going darker, keeping in mind the highlights. I also worked more on the cloak, adding purple for the shadows and Neutral Grey for the really dark folds.

Step Eight
Once I felt the woman was finished I started on the wolf. I first did a wash on the yellow, brown paints. Then went over it with brown tiny hair-like strikes with the 0000 brush. Then again with black and Neutral Grey streaks.

Step Nine
After finishing the wolf I started on the background. Normally you would start on the background first but I was too excited and went for the woman. Haha. Whoopsy doo. Anyway, I again started with a lighter green wash and just went darker and darker on the greens for texture. And I did the same thing for the road leading up to Grandma's house.

Step Ten
After the grass and path, I did the background on the trees. To make it easier, you want to remember that the characters in the front are the most important piece of the painting. So you do a lot of details on them and not so much on the background. You would see this more on my other paintings but this one I decided that I wanted the path to grandma's house to have detail as well. But behind the trees was unnecessary. So I did a dark green gradient from ground and again from the top.

Step Eleven
After doing the gradient, I waited again for it to dry and painted in the trees. If you can tell on the tree to the far right, I did little lines to show the grains in the tree. The trees in the background, again don't really need the extra effort.

Step Twelve
Next I added in the moss to granny's roof, added blue/grey smoke out of the chimney, added trees leaves and painted the left tree a lighter color also with the wood grain.

Step Thirteen
I added detail to granny's house and then started on the flowers up front and on the tree. To avoid petals bleeding into each other, I did one on one side then switched to the other side. Then waited for it to dry.

Step Fourteen
I added the detail to the flowers and to the leaves. Again using my tiniest brush. I probably should have done a color composition, but I hate doing those. I'm so impatient. I would recommend doing that. I wouldn't have used orange on the flowers, I probably would have done blue instead.

Step Fifteen
Again, forgot the to take pictures, I started the maple leaves and roses. I added red the the sides to add symmetry. Makes the woman stands out more.

Step Sixteen
Finished the details, double checked everything and make it work. I added a purple ring around the work because it was the only color that made since. Please do color compositions. :/

Last Step!
And that's it! I added my finished palettes to the bottom. My work process is really weird but I still practice almost everyday making my work better and more exciting. I'll do another process blog later on and we can see the improvement!


Tell me in the comments about your artistic process! I would love to hear about them!
I will be posting a new blog post every Wednesday!
Wow, I love hearing about your process! I'm sure everyone's is different. Yours is amazing!! And well-explained, too! I'll look forward to seeing your next process blog! =D
ReplyDelete